Overview
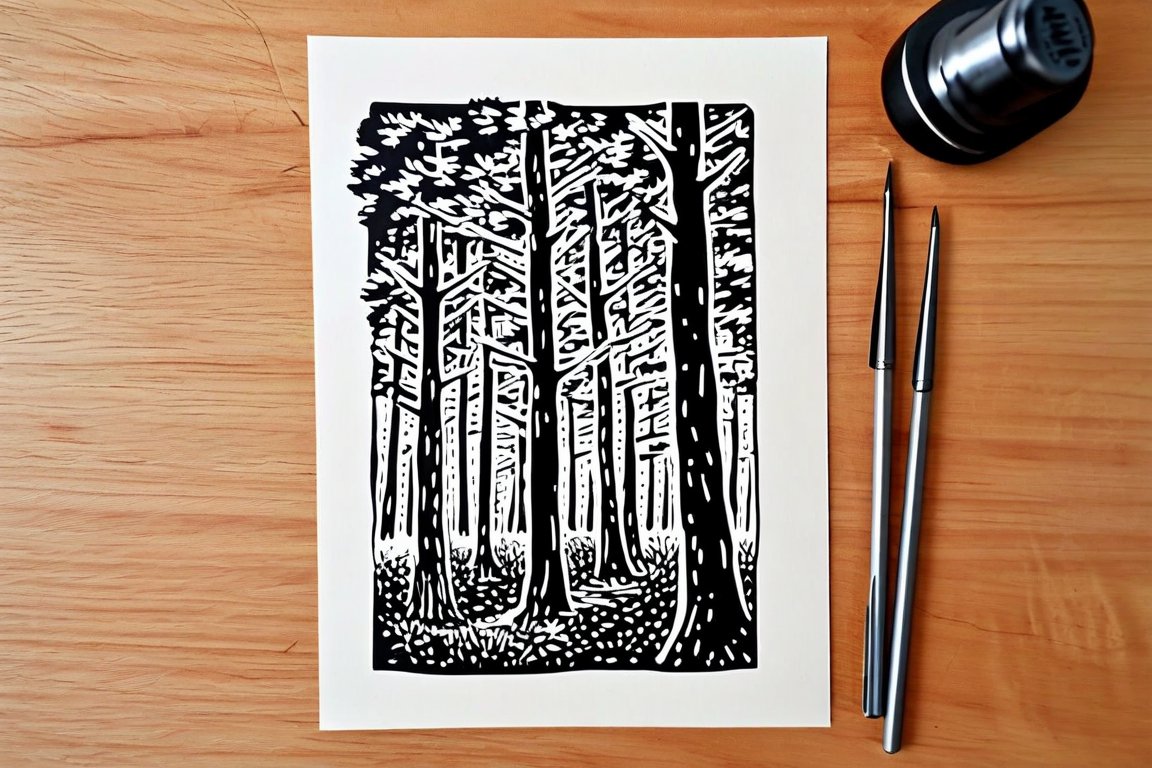
In this project, you'll create a 6x8 inch linocut print, a rewarding experience that merges art and craftsmanship. It's fun because you get to carve your design into a block of linoleum and see it come to life on paper. Beginners often slip when applying ink or aligning the paper, but with patience and practice, you'll master it.
Materials
- Linoleum block (15x20 cm or 6x8 inches)
- Carving tools (U-gouge and V-gouge)
- Water-based printing ink (100 ml or 3.4 oz)
- Brayer (10 cm or 4 inches wide)
- Palette or flat surface for inking
- High-quality printmaking paper (4 sheets, 20x25 cm or 8x10 inches)
- Spoon or baren for hand printing
- Pencil and tracing paper (for transferring designs)
- Painter's tape (optional, for registration)
Time & Difficulty
- Total time: 90 minutes
- Active time: 60 minutes
- Drying time: 24 hours
- Difficulty: Beginner
Step-by-Step
- Transfer your design onto the linoleum block using tracing paper and a pencil.
- Secure the block on your work surface using painter's tape to prevent slipping.
- Begin carving with the V-gouge for detailed lines, holding the tool at a low angle.
- Switch to the U-gouge for broader areas, ensuring to carve away from your body.
- Test your design by rubbing a pencil over the surface to identify areas needing more carving.
- Squeeze a small amount of ink onto your palette and roll it out evenly with the brayer.
- Apply the ink to your carved block, ensuring full coverage without excess.
- Align your paper carefully over the inked block using registration techniques with tape.
- Press the paper onto the block using a spoon or baren, applying even pressure.
- Peel back the paper gently to reveal your print, and set it aside to dry.
- Repeat the inking and printing process for additional prints.
Pro Tips
- Keep your carving tools sharp for cleaner cuts and easier carving.
- Use a light touch when applying ink to avoid blotchy prints.
- Experiment with different pressures when printing for varied effects.
Common Mistakes
- Carving too deep can weaken the block; fix by reinforcing with a backing sheet.
- Uneven ink application leads to patchy prints; roll out ink thoroughly on the palette.
- Misaligned prints occur without proper registration; mark your paper and block for alignment.
Safety Notes
- Always carve away from your hands and body to prevent injury.
- Use water-based inks in a well-ventilated area to avoid inhaling fumes.
Cleanup & Storage
- Wash tools and brayer with warm, soapy water immediately after use.
- Store dried prints flat to prevent warping or curling.
- Keep linoleum blocks in a cool, dry place to avoid cracking.
Next Exercises
- Experiment with multi-color prints by carving additional layers.
- Create a series of prints with variations on your original design.
- Try using different paper types to see how texture affects your print.