Overview
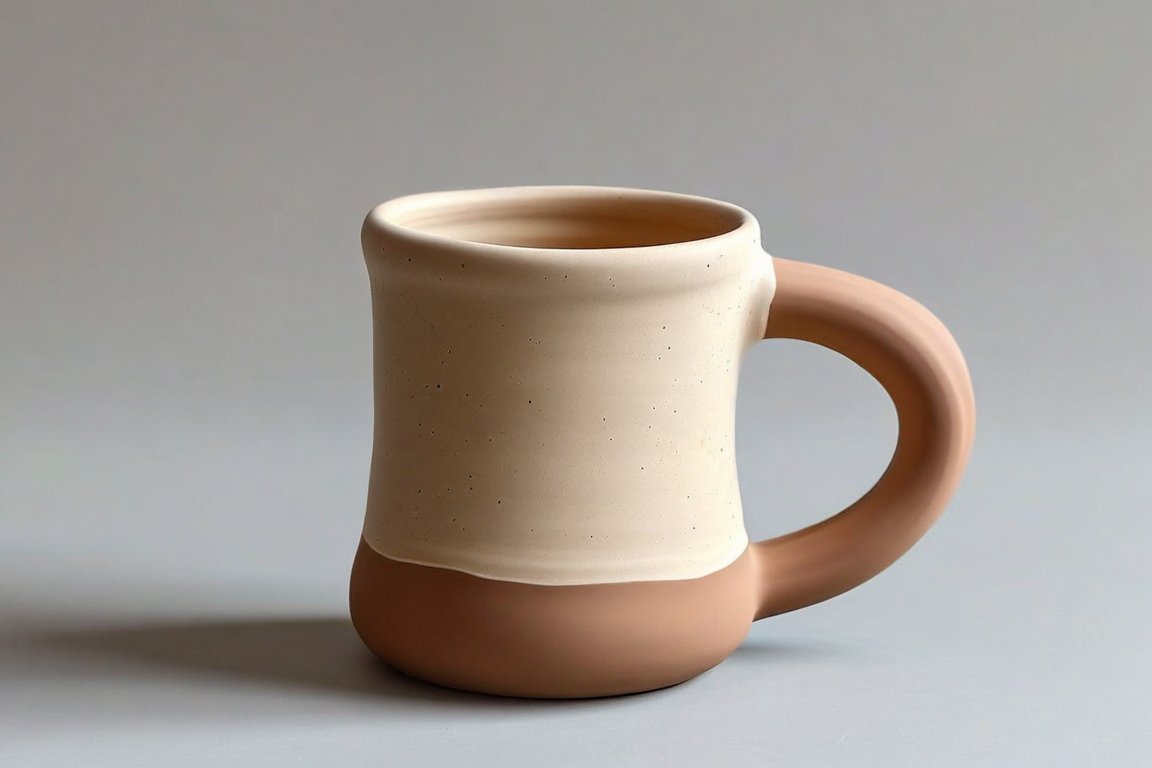
Today, you'll create a hand-built ceramic mug using air-dry clay and the slab technique. This project is both fun and rewarding, allowing you to express your creativity while learning essential pottery skills. Beginners often find the scoring and slip process tricky, but with a bit of practice, you'll master it in no time.
Materials
- 500g (1 lb) air-dry clay
- Rolling pin or a cylindrical bottle
- Clay knife or a butter knife
- Ruler
- Small bowl of water
- Scoring tool or a fork
- Old toothbrush (optional)
- Paintbrushes for slip and glaze
- Air-dry clay slip (mix a small amount of clay with water)
- Acrylic or ceramic paints
- Clear acrylic sealant (optional)
Time & Difficulty
- Total time: 2 hours
- Active time: 1.5 hours
- Curing/drying: 24-48 hours
- Difficulty: Beginner-friendly
Step-by-Step
- Prepare your workspace by covering it with a plastic sheet or newspaper to catch any mess.
- Knead the clay until it’s soft and pliable to remove air bubbles and ensure even texture.
- Roll out the clay to about 0.5 cm (1/4 inch) thick using your rolling pin, keeping it uniform.
- Cut a rectangle approximately 25 cm x 10 cm (10 in x 4 in) for the mug body.
- Score the edges of the rectangle with your scoring tool or fork where they will join to form a cylinder.
- Apply slip to the scored edges using a paintbrush to act as glue.
- Form the cylinder by carefully pressing the scored edges together, smoothing the seam with your fingers.
- Cut a circle for the base, using the cylinder as a guide, and score both the base and bottom of the cylinder.
- Attach the base using slip, pressing gently and smoothing the seam with a damp finger.
- Create a handle by rolling a clay coil about 1 cm (1/2 in) thick and attaching it with slip, ensuring it’s secure.
- Let the mug dry for 24-48 hours, turning it occasionally to ensure even drying.
- Paint and seal your mug with acrylic or ceramic paints, finishing with a clear acrylic sealant if desired.
Pro Tips
- Use an old toothbrush to add texture to your mug for a unique finish.
- Keep a spray bottle of water handy to keep your clay moist as you work.
- Experiment with different handle shapes for comfort and style.
Common Mistakes
- Clay drying out too quickly? Cover it with a damp cloth when not in use.
- Handles falling off? Ensure both surfaces are well scored and slipped before attaching.
- Uneven mug edges? Use a ruler and knife to trim before joining edges.
Safety Notes
- Use tools carefully to avoid cuts.
- Avoid inhaling clay dust; clean up with a damp cloth.
- Ensure proper ventilation when using sealants.
Cleanup & Storage
- Wipe surfaces with a damp cloth to remove clay residue.
- Store unused clay in an airtight container to keep it from drying out.
- Clean brushes immediately after use to prevent hardening.
Next Exercises
- Create a matching saucer using the same slab technique.
- Experiment with different textures using household items like lace or leaves.
- Try making a small teapot to complement your mug.
Byline: Claire Stoneharbour