
Overview
This tutorial demonstrates how to build a minimalist floating shelf from birch plywood using invisible dowel joinery. The finished shelf measures 36 inches wide, 8 inches deep, and 3 inches thick, with no visible fasteners or hardware. The design emphasizes clean lines and the natural beauty of birch, making it ideal for modern interiors. You will learn precise measuring, drilling, and assembly techniques to achieve a seamless, professional result.
Learning Objectives
- Accurately measure and mark for hidden dowel joinery
- Use a drill press and doweling jig for precise dowel hole alignment
- Glue and clamp components for strong, gap-free joints
- Hand sand plywood for a smooth, tactile finish
- Apply a natural oil finish to highlight birch grain and protect the wood
- Assemble a floating shelf with no visible fasteners
Project Plan
The shelf is constructed from 18mm birch plywood, cut into three main parts: the shelf bottom, the front face, and a back cleat. These are joined using 8mm wood dowels, which are completely hidden within the plywood edges. The back cleat is set in from the rear to allow the shelf to slide onto wall-mounted supports, creating the floating effect. The natural oil finish preserves the light color and subtle grain of birch plywood, resulting in a sturdy, visually seamless shelf.
Materials
- 18mm birch plywood panel (at least 48" x 12")
- 8mm diameter, 50mm long wood dowels (minimum 10)
- Wood glue (PVA, interior grade)
- Natural oil finish (tung or linseed oil; water-based alternatives acceptable)
- 220 and 320 grit sandpaper
- Masking tape
Alternatives: For those sensitive to oil finishes, use a water-based polyurethane. Hypoallergenic or formaldehyde-free adhesives are available for those with glue sensitivities.
Tools & Setup
- Drill press with doweling jig
- Table saw or track saw
- Clamps (bar or parallel)
- Measuring tape, square, and marking knife or pencil
- Sanding block
- Linen-free cloth for finishing
- Skill level: Intermediate
- Estimated time: 6 hours over two sessions (plus drying time)
- Venue: Supervised professional woodshop studio
- Safety: Standard workshop safety with eye and hearing protection
Visual Process Stages
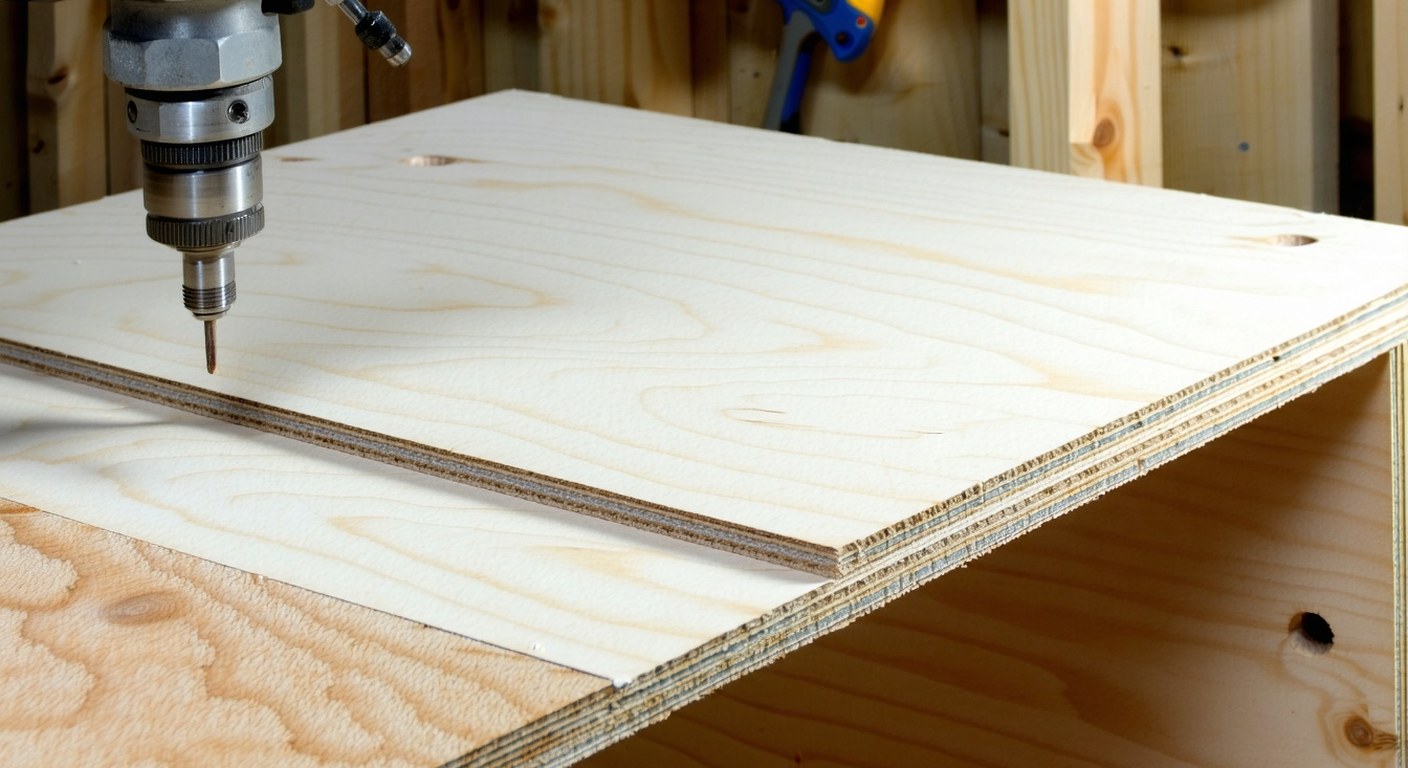
- Birch plywood panel with clean-cut edges and dowel hole locations marked
- Drilling matching dowel holes on shelf parts using drill press and doweling jig
- Dry fitting dowels to align shelf components for invisible joints
- Gluing and clamping shelf parts to ensure flush, seamless edges
- Finished shelf after sanding and oil finish, mounted on wall with no visible fasteners
Step-by-Step Instructions
- Prepare your workspace. Clear a flat work surface and gather all tools and materials. Ensure the drill press and doweling jig are set up and calibrated.
-
Measure and mark plywood. Mark out three pieces on the birch plywood:
- Shelf bottom: 36" x 8"
- Front face: 36" x 3"
- Back cleat: 36" x 3"
- Cut the components. Use a table saw or track saw to cut the marked pieces. Lightly sand the cut edges with 220 grit sandpaper to remove any splinters.
- Mark dowel hole locations. On the shelf bottom, mark five evenly spaced dowel positions along both the front and back edges (one 1" from each end, three spaced equally between). Transfer these marks to the mating edges of the front face and back cleat.
- Set up doweling jig and drill press. Adjust for 8mm dowels and set the depth stop to 25mm to avoid drilling through the plywood.
- Drill dowel holes in the shelf bottom. Secure the shelf bottom in the doweling jig and drill 25mm deep holes at each marked position along both edges.
- Drill matching holes in front face and back cleat. Clamp each piece in the jig and drill corresponding holes, ensuring perfect alignment.
- Dry fit the dowels. Insert dowels into the shelf bottom and test fit the front face and back cleat. All joints should be flush and tight. Adjust as needed.
- Mask glue lines. Apply masking tape along visible faces near the joints to prevent glue stains.
- Glue and assemble. Remove dry-fitted pieces. Apply glue into each dowel hole and along the mating edges. Insert dowels into the shelf bottom, then press the front face and back cleat onto the dowels.
- Clamp the assembly. Use clamps to hold all joints tightly together. Check for flush faces and square corners. Wipe away any excess glue immediately.
- Let glue cure. Leave the assembly clamped for at least 2 hours, or overnight for maximum strength.
- Remove clamps and tape. Once the glue is set, carefully remove all clamps and masking tape.
- Hand sand all surfaces. Sand the shelf with 220 grit, then 320 grit sandpaper, focusing on smoothing glue residue and evening out edges. Always sand with the grain.
- Apply oil finish. Wipe on a thin, even coat of oil with a lint-free cloth. Allow to soak in for 15 minutes, then remove excess. Let dry for at least 4 hours, then apply a second coat if desired.
- Mount the shelf. Install concealed shelf brackets into wall studs at the desired height. Slide the shelf onto the supports so it sits flush against the wall.
Visual Checkpoints
- After cutting: Three birch plywood pieces with crisp edges and clearly marked dowel positions.
- After drilling: Clean, accurately spaced dowel holes with no splintering.
- During dry fit: All components align perfectly, with flush joints and no gaps.
- After glue-up: Assembly is tight, with no glue on visible surfaces and even clamping pressure.
- After finishing: Shelf has a smooth, even surface, highlighted grain, and seamless joints.
Tips for Success
- Use a sharp brad-point drill bit for clean dowel holes.
- Mark dowel locations with a marking knife for greater precision.
- Chamfer dowel ends slightly for easier insertion and to prevent splitting.
- Apply oil finish in thin coats to avoid a sticky or uneven surface.
- Choose plywood with matching face veneers for the most seamless look.
Common Issues and Solutions
- Misaligned dowel holes: Carefully widen with a dowel hole reamer or fill and re-drill if necessary.
- Glue on plywood face: Wipe away immediately; if dried, scrape gently and sand smooth.
- Gaps at joints: Disassemble before glue sets, clean surfaces, and re-glue with proper pressure.
- Splintered edges: Sand with progressively finer grits, always following the grain.
- Uneven finish: Lightly sand between coats and apply oil thinly and evenly.
Safety Guidelines
- Wear eye and hearing protection when using power tools.
- Secure workpieces with clamps during cutting and drilling.
- Keep hands away from blades and drill bits; use push sticks for small parts.
- Ensure good ventilation when applying oil finishes and keep away from open flames.
- Dispose of oily rags in a sealed metal container to prevent fire risk.
Finishing, Display, and Care
Allow the oil finish to cure for at least 24 hours before placing items on the shelf. Dust regularly with a soft cloth and reapply oil every 6–12 months or when the surface appears dull. Avoid overloading the shelf; ensure wall hardware and studs can support the intended weight. This shelf is best suited for lightweight decor, books, or plants, highlighting both function and craftsmanship.
Cleanup and Storage
- Clean glue from tools and clamps with warm water before it dries.
- Store leftover dowels and sandpaper in a dry, dust-free place.
- Seal oil finish containers tightly and keep away from heat.
- Dispose of oily rags safely according to local regulations.
- Return all tools to storage and sweep the workspace clean.
Project Variations
- Try different plywood species for varied appearance.
- Adjust shelf depth or thickness for different uses.
- Add LED strip lighting beneath the shelf for accent lighting.
- Use mitered corners with dowel reinforcement for a refined joint.
- Apply pigmented oil or tinted wax for a custom color while preserving wood grain.