
Overview
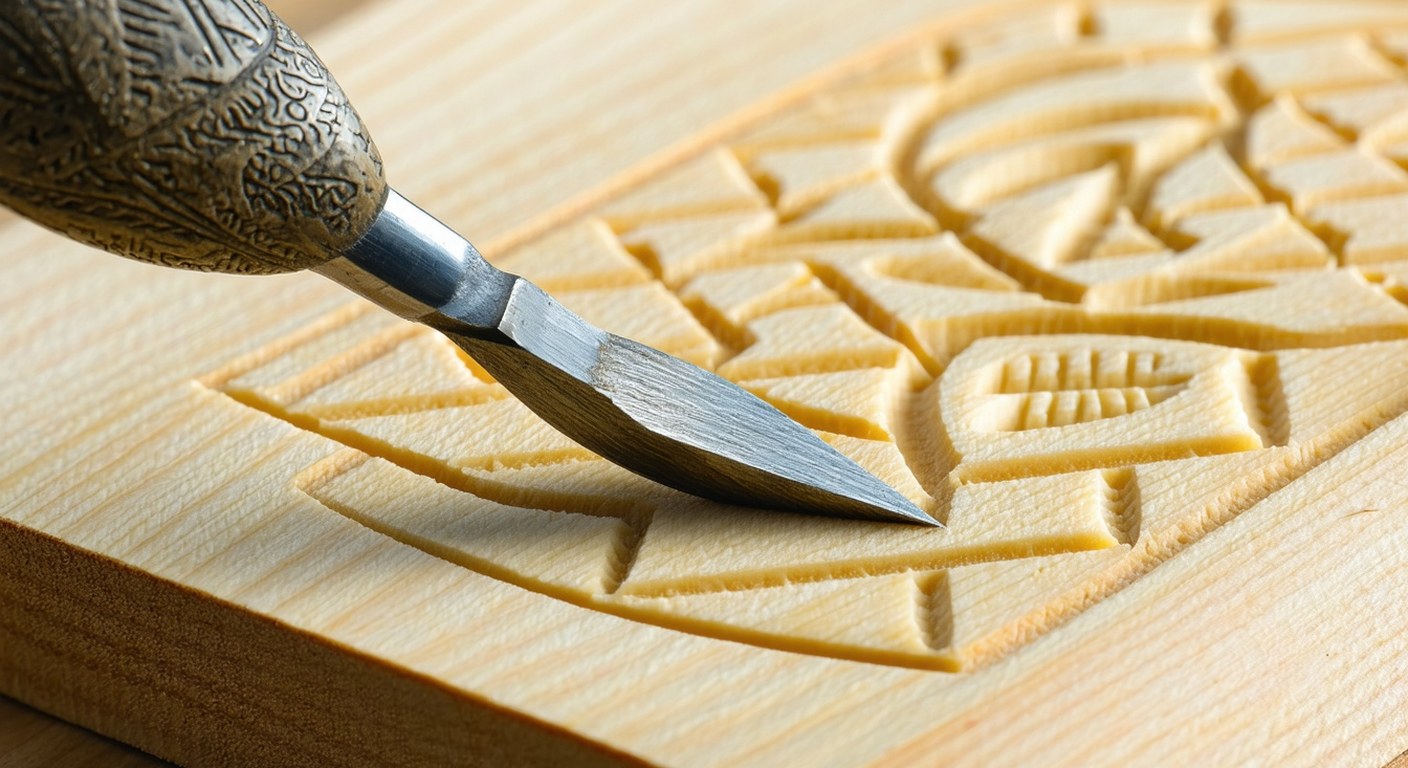
This project guides you through the creation of a hand-carved wooden pendant necklace featuring an intricate geometric relief. Using a basswood or limewood blank, you will transfer a precise geometric pattern, carve it in shallow relief, and finish the pendant with a natural beeswax polish and a leather cord or chain. The finished piece measures approximately 6.3 cm tall by 3.8 cm wide by 8 mm thick (2.5 × 1.5 × 0.3 inches), making it a striking yet wearable work of art. This project is ideal for those seeking to expand their skills in decorative carving, pattern transfer, and fine finishing techniques within a studio jewelry-making context.
What You Will Learn
- Safe and precise use of carving gouges and chisels for shallow relief work
- Transferring and scaling geometric designs onto a small wood surface
- Shaping, refining, and smoothing raised relief patterns for crisp definition
- Applying natural finishes to highlight wood grain and protect the pendant
- Assembling a functional, wearable art object with professional craftsmanship
Design Plan
The pendant features a geometric relief pattern—such as interlocking triangles, chevrons, or tessellated diamonds—hand-carved into a rectangular or oval basswood blank. The design stands proud of a recessed background, creating a tactile, dimensional surface. After carving and sanding, a wax finish enhances the wood’s warmth and texture. The pendant is completed by drilling a small hole at the top and threading it onto a leather cord or metal chain for wear.
- Dimensions: 6.3 cm (2.5 in) tall × 3.8 cm (1.5 in) wide × 8 mm (0.3 in) thick
- Shape: Rectangular with softened corners or oval
- Pattern: Geometric relief (choose or draw your own)
- Finish: Natural beeswax or wood oil, optional light stain
- Stringing: Leather cord or fine chain through a drilled hole
Materials & Safe Alternatives
- Basswood or limewood carving blank (6.5 × 4 × 1 cm / 2.6 × 1.6 × 0.4 inches; cut down if needed)
- Carving gouges and chisels set (small U-gouge, V-gouge, and flat chisel)
- Fine sandpaper (220 to 400 grit; sanding block optional)
- Natural beeswax or clear wood finish (food-safe mineral oil or walnut oil as alternatives)
- Leather cord or metal chain (1.5–2 mm diameter)
- Small drill or pin vise (1.5–2 mm drill bit)
- Pencil and template paper (for pattern transfer)
- Masking tape (optional, for holding template)
- Dust mask and protective eyewear (mandatory in studio)
- Bench hook or carving clamp (for safe work holding)
Safe alternatives: If you do not have basswood or limewood, use another fine-grained, non-toxic carving wood such as cherry or maple. Avoid woods with strong allergens or resins. For finishing, avoid solvent-based varnishes; stick with natural waxes or oils.
Time, Difficulty & Setup
- Estimated time: 6–8 hours (including pattern transfer, carving, sanding, finishing, and assembly)
- Skill level: Intermediate (requires some experience with hand carving and tool control)
- Setup: Work in a well-lit studio space with a sturdy bench, carving clamps/bench hook, dust mask, and eye protection. Keep your tools sharp and organized.
- Budget: $25–$50 (most tools are reusable for future projects)
Visual Roadmap
- Smooth basswood blank prepared and pencil-drawn geometric pattern applied
- Initial shallow outlining gouge cuts defining pattern edges
- Intermediate relief carving removing wood background to create depth
- Fine detail shaping and smoothing of raised pattern surfaces
- Sanded, wax-finished pendant with drilled hole and leather cord attached
Step-by-Step
- Prepare the wood blank. Cut or sand your basswood or limewood blank to approximately 6.3 × 3.8 × 0.8 cm (2.5 × 1.5 × 0.3 inches). Lightly sand all faces and edges with 220-grit sandpaper to remove splinters and pencil marks.
- Draw or transfer the geometric pattern. Sketch your geometric design on template paper at full scale. Use graphite transfer (shading the back of your template with pencil, then tracing over the front) or freehand the design directly onto the wood with a sharp pencil.
- Secure the blank for carving. Fix the wood blank on a bench hook or clamp. Ensure stability and that your hands will not be in the path of the tools.
- Outline the pattern with shallow gouge cuts. Using a small V-gouge or U-gouge, carefully trace along the pencil lines, making shallow (1–2 mm deep) cuts to define the edges of each geometric shape. Work slowly and maintain even pressure for crisp outlines.
- Deepen the outlines. Repeat the outlining cuts, gradually deepening them to 2–3 mm (about 1/8 inch). This creates a clear boundary for the relief pattern.
- Begin background removal. With a small flat chisel or shallow gouge, gently carve away the wood in the background areas, lowering them by 2–3 mm so that the geometric shapes remain raised.
- Refine the relief depth. Continue removing background wood, checking frequently for even depth and clean transitions up to the pattern edges. Use smaller gouges for tight corners and narrow spaces.
- Smooth the background. Use a fine, flat chisel or a small spoon gouge to smooth out tool marks in the recessed areas. Aim for a uniform, slightly textured surface that contrasts with the raised pattern.
- Shape and refine the raised pattern. Carefully round or bevel the edges of the raised geometric shapes if desired, using a detail gouge or fine chisel. This adds dimensionality and tactile interest.
- Hand-sand the pendant. Using 320- or 400-grit sandpaper, gently smooth all surfaces, especially the raised pattern and pendant edges. Avoid sanding away crisp details; use folded sandpaper or sanding sticks for tight spots.
- Drill the hanging hole. Mark the top center of the pendant (about 3–4 mm from the edge). Using a pin vise or small drill, carefully drill a 1.5–2 mm (1/16 inch) hole straight through for the cord or chain.
- Clean off dust and inspect. Brush away sanding dust with a soft brush or cloth. Inspect all surfaces for tool marks or rough spots and touch up as needed.
- Apply the wood finish. Rub a thin coat of natural beeswax or food-safe oil into all surfaces, using a soft cloth. Let it absorb for 20–30 minutes, then buff gently to a soft sheen. Repeat for extra protection if desired.
- Thread the cord or chain. Cut a length of leather cord or select a chain. Thread it through the drilled hole and tie a secure knot or attach a clasp as preferred.
- Final inspection and touch-ups. Check the pendant for smoothness, finish coverage, and secure stringing. Buff again with a clean cloth if needed.
- Try on or display your finished pendant. Wear your new geometric carved pendant, or display it as a small decorative art object.
Visual Checkpoints
- After Step 2: The wood blank is evenly sanded, with a crisp, visible geometric pattern drawn in pencil on the front surface.
- After Step 5: All pattern outlines are defined by clean, shallow gouge cuts, creating a visible guide for relief carving.
- After Step 7 (Critical Stage): The background wood is partially removed, leaving the geometric pattern raised above a recessed, rough-textured background. Tool marks are visible but controlled.
- After Step 10: All surfaces are smooth to the touch, with crisp, well-defined relief and clean pendant edges. The pattern stands out clearly against the background.
- After Step 14: The pendant has a soft, natural sheen, with the cord or chain securely threaded through the drilled hole, ready to wear or display.
Pro Tips
- Keep your carving tools razor-sharp for clean cuts and safer control.
- Practice your pattern on a scrap piece before transferring to the pendant blank.
- Work slowly and rotate the piece as needed for the best tool angle and visibility.
- Use a soft pencil for the pattern—hard pencils can dent the wood surface.
- Buff the final wax finish with a lint-free cloth for a subtle, professional sheen.
Common Mistakes & Fixes
- Chipped edges on raised pattern: Use lighter, controlled cuts and support delicate areas with your fingers (behind the tool, never in front). Minor chips can be sanded smooth or integrated into the design.
- Uneven relief depth: Frequently check depth with a ruler or caliper. Gently level high spots with a fine gouge or sandpaper wrapped around a dowel.
- Rough tool marks in background: Use a smaller gouge or sanding stick to smooth. Slight texture can be attractive for contrast.
- Drill hole splintering: Place a scrap wood backing under the pendant when drilling to prevent tear-out. Sand the hole edges if needed.
- Finish blotching: Ensure all sanding dust is removed before applying wax or oil. Apply thin, even coats and buff thoroughly.
Safety Notes
- Always wear protective eyewear and a dust mask when carving and sanding.
- Keep both hands behind the cutting edge of your tools at all times.
- Secure the workpiece firmly to prevent slips.
- Sharpen tools regularly to reduce the risk of forcing cuts.
- Do not use solvent-based finishes or stains in enclosed spaces.
- Supervise inexperienced carvers or minors in a professional studio setting.
Finishing, Display & Care
- Reapply beeswax or oil finish every few months to maintain luster and protect the wood.
- Store the pendant in a cool, dry place away from direct sunlight to prevent fading or warping.
- If worn regularly, avoid exposing the pendant to water, perfumes, or lotions, which can damage the finish.
- For display, hang the pendant on a jewelry stand or mount in a shadow box to highlight the relief carving.
Cleanup & Storage
- Brush or vacuum wood chips and dust from your workspace after carving and sanding.
- Wipe tools clean and lightly oil metal parts to prevent rust.
- Store carving tools in a roll or box with blade guards.
- Seal unused wax or oil containers tightly and store away from heat sources.
- Dispose of sanding dust responsibly; do not inhale or ingest wood particles.
Next Variations
- Experiment with different geometric patterns—try radial symmetry, spirals, or tessellations for new visual effects.
- Use contrasting wood species for inlay or layered pendants.
- Incorporate subtle color by applying a light wood stain before finishing.
- Add a metal bail or decorative bead above the pendant for mixed-media appeal.
- Create a series of pendants with varying shapes and relief depths for a dynamic jewelry collection.