
Overview
This project guides you through creating a striking textured abstract canvas painting using layered metallic acrylics. By combining rich metallic paints (silver, copper, gold) with deep blue, charcoal gray, and white highlights, you'll explore how light interacts with surface variation. Through controlled texture techniques using palette knives and brushes, you'll achieve dynamic impasto effects and a sophisticated decorative piece suitable for modern interiors. The finished work, measuring 16 x 20 inches (40 x 50 cm), will shimmer with reflective metallics and reveal depth through layered color contrasts.
What You Will Learn
- How to manipulate metallic acrylic paints for luminous, reflective effects
- Techniques for layering and texturing acrylics using palette knives and brushes
- Methods for blending and contrasting metallic and matte colors
- Sequencing and drying times for successful layered acrylic painting
- Strategies for achieving controlled impasto and avoiding overworked surfaces
- Approaches to abstract composition for decorative wall art
Design Plan
Your finished painting will feature a deep blue base, overlaid with bold, textured sweeps of copper, silver, and gold metallic acrylics. Charcoal gray and white will be used to introduce depth and highlight areas, creating visual movement. The composition is abstract, emphasizing the interplay of reflective metallics against matte backgrounds. Texture is built up using palette knives for impasto effects, with select areas refined by brush for subtle blending. The result is a visually dynamic, tactile artwork that captures and reflects light in varying ways.
Materials & Safe Alternatives
- 16 x 20 inch (40 x 50 cm) stretched canvas – pre-primed for acrylics
- Metallic acrylic paints: silver, copper, gold
- Deep blue, charcoal gray, and white acrylic paints
- Palette knives: small and medium sizes (plastic or metal; plastic is safer for home use)
- Flat and round acrylic brushes: various sizes
- Acrylic texture medium (optional): for extra impasto, choose a non-toxic, pre-mixed medium
- Water container (for rinsing brushes and thinning paint)
- Palette (disposable paper palette or washable plastic/ceramic plate)
- Rags or paper towels (for wiping tools and blotting excess paint)
Safe Alternatives: Use plastic palette knives for reduced risk of accidental cuts. Select water-based, non-toxic acrylics and mediums. Avoid solvent-based products. If sensitive to dust, choose pre-mixed texture mediums rather than powders.
Time, Difficulty & Setup
- Estimated time: 4–6 hours over two sessions (to allow for proper drying between layers)
- Skill level: Intermediate (some experience with acrylics and palette knives recommended)
- Venue: Studio or well-ventilated home art space with a flat work surface
- Setup tips: Cover your work table with plastic or a drop cloth. Set up all materials within easy reach. Ensure good lighting to observe the reflective effects of metallic paints.
Visual Roadmap
- Blank primed canvas stretched on frame, ready for painting.
- Base layer: Deep blue acrylic paint evenly brushed across the canvas.
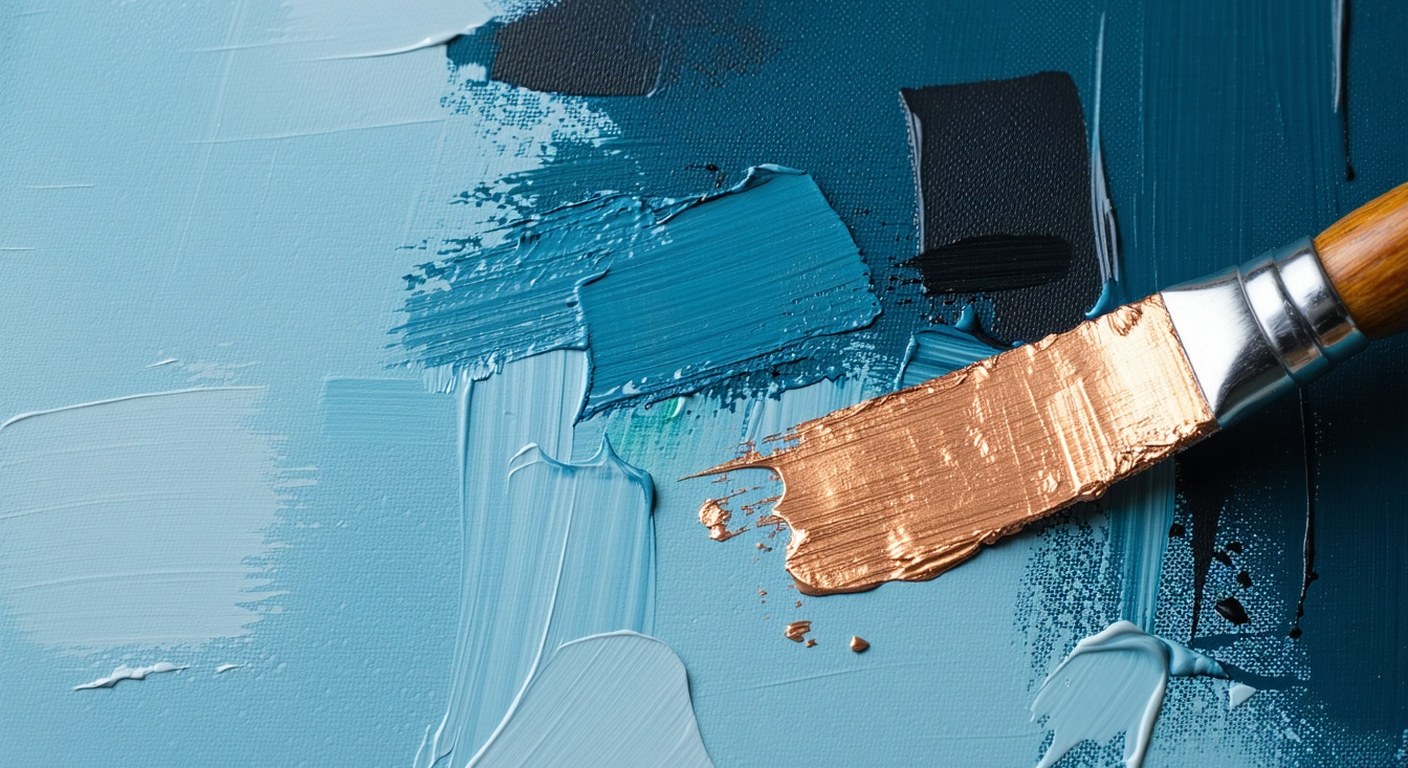
- First metallic layer: Metallic paint (copper) applied with a palette knife in bold, sweeping strokes.
- Additional metallic layers: Silver and gold built up with thick texture and fine brush highlights, plus touches of charcoal gray and white.
- Finished painting: A richly textured, reflective surface with layered metallics, color contrasts, and dynamic light play.
Step-by-Step
- Prepare your workspace. Lay down a protective covering, set up your canvas on an easel or flat table, and arrange your paints, palette, knives, brushes, and water container.
- Inspect and secure the canvas. Ensure the 16 x 20 inch (40 x 50 cm) canvas is taut and primed. If needed, apply a thin coat of gesso and let dry for 30–60 minutes.
- Mix your base color. On your palette, blend deep blue acrylic with a touch of water (no more than 10%) for smooth application.
- Apply the blue base layer. Use a large flat brush to cover the entire canvas with the deep blue, working in even, horizontal or vertical strokes. Let dry 30–45 minutes.
- Block in composition zones. With a lightly damp brush and diluted charcoal gray, sketch broad zones where you plan to apply metallics and highlights. These will guide your layering but remain subtle.
- Prepare metallic paints. Squeeze out small amounts of copper, silver, and gold metallic acrylics onto your palette. If you wish to increase texture, mix in a small amount of acrylic texture medium following manufacturer instructions.
- Begin first metallic layer (copper). Using a small palette knife, load the blade with copper metallic paint. Starting at one edge of your planned composition, drag the knife in sweeping, arched strokes, varying pressure for both thin and thick applications. Leave areas of blue visible for contrast.
- Develop texture and form. With a medium palette knife, add more copper in overlapping strokes, occasionally lifting the knife to create peaks and ridges. Allow some strokes to remain smooth for reflective contrast.
- Let the copper layer set. Allow this layer to dry for at least 45–60 minutes before proceeding. This prevents muddying when adding new metallics.
- Layer silver metallic paint. With a clean palette knife, apply silver metallic paint in select areas, overlapping some copper and blue zones. Use a lighter touch to create subtle, shimmering highlights and varied surface levels.
- Add gold accents. With a small palette knife or round brush, introduce gold metallic paint in targeted areas—such as the edges of copper forms or where you want extra warmth and visual interest.
- Integrate charcoal gray and white. Using a flat brush, blend charcoal gray into some recesses or borders of metallic zones to increase depth. Dry brush white highlights onto raised textures for added dimension and light play.
- Refine transitions. With a clean, slightly damp brush, softly blend edges between metallic and matte areas where desired, but avoid overworking to maintain distinct texture.
- Assess and enhance surface variation. Step back and view the painting from different angles. Add additional metallic or matte highlights with a palette knife or brush as needed to balance the composition and enhance reflective effects.
- Final drying. Allow the completed painting to dry flat in a dust-free area for at least 12–24 hours before handling or displaying.
- Optional: Varnish for protection. Once fully dry (48–72 hours), apply a clear acrylic varnish suitable for metallics to protect the surface and unify sheen. Let cure according to product instructions.
Visual Checkpoints
- After step 4: The canvas is evenly coated in deep blue, with no visible white spots or streaks.
- After step 7: Bold, textured copper strokes appear over the blue base, with the palette knife resting on the canvas edge and fresh metallic paint clearly visible in raised, reflective lines.
- After step 11: Silver and gold metallics layer over copper and blue, creating complex, reflective surfaces with distinct texture and color contrast.
- After step 13: Charcoal gray and white have been integrated, increasing depth and accentuating raised textures without dulling the metallic sheen.
- At completion: The painting displays a harmonious interplay of metallic and matte areas, with controlled impasto, dynamic light reflection, and a balanced abstract composition.
Pro Tips
- Test metallic paints on a scrap surface to observe how they reflect light at different thicknesses.
- Keep palette knives and brushes clean between color changes to prevent muddying metallics.
- Work in natural light or under a daylight lamp to best judge color and reflectivity.
- Use a gentle touch when blending to preserve distinct textures and avoid flattening impasto.
- If a section becomes overworked, allow it to dry, then layer fresh metallic paint for renewed brilliance.
Common Mistakes & Fixes
- Muddy metallics: If metallics mix with wet blue or gray and lose shine, let the area dry fully, then reapply metallic paint with a clean knife.
- Over-flattened texture: If you accidentally smooth out impasto, wait for the layer to dry, then build up fresh texture with thicker paint or added medium.
- Unbalanced composition: If one area is too dense or bright, add matte blue or gray to calm it, or extend metallics elsewhere for harmony.
- Visible brush hairs or debris: Gently lift out with tweezers while paint is wet, or wait until dry and touch up with matching color.
- Paint drying too quickly: Mist the palette with water or use a slow-drying acrylic medium to extend working time.
Safety Notes
- Work in a well-ventilated area, especially when using metallic or texture mediums.
- Wear an apron or old clothing to protect against splashes.
- Keep palette knives pointed away from yourself and others when in use.
- Do not ingest paint or allow it to come into contact with eyes or mouth.
- Wash hands thoroughly after painting, especially before eating or touching your face.
Finishing, Display & Care
- Allow the painting to cure for at least 48–72 hours before applying varnish or hanging.
- Display on a sturdy hook or wire, out of direct sunlight to preserve color brilliance.
- Dust gently with a soft, dry cloth; avoid abrasive cleaning or moisture on the surface.
- If varnished, use only products labeled safe for acrylic and metallic paints.
- Store or transport upright and protected with acid-free paper or bubble wrap to prevent surface abrasion.
Cleanup & Storage
- Rinse all brushes and palette knives immediately after use with water and mild soap.
- Wipe down your palette and work surface with a damp cloth.
- Dispose of paint water in accordance with local regulations—never pour down household drains.
- Store leftover paints tightly sealed in a cool, dry place.
- Keep tools and unused canvas away from heat and direct sunlight.
Next Variations
- Experiment with different color palettes, such as cool silvers with teal and violet, or warm golds with crimson and ochre.
- Try adding stenciled or masked geometric shapes beneath or atop metallic layers for added structure.
- Incorporate subtle textures by pressing fabric, bubble wrap, or textured paper into wet acrylic before applying metallics.
- Scale up to a larger canvas for a dramatic statement piece, or create a diptych/triptych series with coordinated color schemes.
- Introduce translucent glazes between metallic layers for even greater depth and complexity.